Microsoft Word is a powerful word processing tool used by millions of people worldwide for creating documents of all kinds. One of the common formatting elements used in Word documents is the section break. This allows users to divide their document into different sections with unique formatting options. However, there may be times when you want to remove a section break to modify the layout or formatting of your document. In this article, we will provide a step-by-step guide in mastering the art of section break removal in Word. And also with useful tips and tricks to ensure a smooth editing experience.
Understanding Section Breaks
Before we dive into the process of removing section breaks. It’s essential to understand what section breaks are and how they work in Word. Section breaks are formatting elements that allow users to separate different parts of a document, such as chapters, sections, or pages, with unique formatting options. Word offers four types of section breaks: Next Page, Continuous, Even Page, and Odd Page. Each type of section break has its own purpose and usage, such as starting a new section on the next page, creating a landscape page orientation, or applying different headers and footers in a document. Section breaks are commonly used in documents with complex formatting requirements, such as reports, theses, or legal documents.
Reasons to Remove Section Breaks
While section breaks are helpful in creating documents with varying formatting options, there are several reasons why you might need to remove them:
- Document Editing: You may want to remove a section break to edit the content or formatting within a section without affecting the layout of the entire document.
- Document Formatting: You may want to remove a section break to modify the formatting of a section, such as changing the page orientation, margins, or headers and footers.
- Document Cleanup: You may want to remove unnecessary section breaks that were inserted inadvertently or as a result of copying and pasting content from another document.
Read Also:
- The Microsoft Surface Pro 8
- Why your Channel 4 might not be Working
- Step-by-Step Guide on how to Cancel Your Postcode Lottery Subscription
Step-by-Step Guide to Remove Section Breaks
Below is a step-by-step guide in mastering the art of section break removal in Word:
Step 1: Open Word document: Launch Microsoft Word and open the document which you want to remove the section break.
Step 2: Display formatting marks: In Word, section breaks are hidden by default. To reveal them, go to the “Home” tab in the ribbon, and click on the paragraph mark (“¶”) icon in the “Paragraph” group. This will display all the formatting marks in your document, including section breaks.
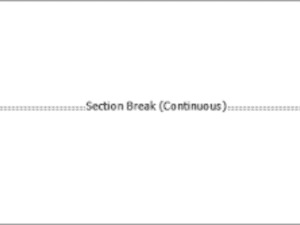
Step 3: Identify the section break: Section breaks appear as a double horizontal line in your document, followed by a paragraph mark. You can locate the section break by scrolling through your document or using the “Find” function (Ctrl + F) and searching for “^b” in the “Find what” field, which represents a section break.
Step-by-Step Guide to Remove Section Breaks (Continues)
Step 4: Place your cursor before the section break: Click your cursor at the end of the text before the section break. Make sure that your cursor is placed in the section that comes before the section break.
Step 5: Delete the section break: Press the “Delete” key on your keyboard to remove the section break. If you have chosen the correct location, the text from the section after the section break will move up to fill the gap, and the formatting of the previous section will be retained.
Step 6: Repeat the process if necessary: If your document contains multiple section breaks, repeat the above steps to remove each section break individually.
Step 7: Turn off formatting marks: After removing all the section breaks, you can turn off the display of formatting marks by clicking on the paragraph mark (“¶”) icon in the “Paragraph” group on the “Home” tab in the ribbon again. This will hide the section breaks and other formatting marks from your document, leaving only the visible content.
Tips and Tricks for Removing Section Breaks
Below is a step-by-step guide in mastering the art of section break removal in Word.
Removing section breaks in Word can be a simple process, but it’s important to keep a few tips and tricks in mind to ensure smooth editing and formatting:
- Be cautious when deleting section breaks: Section breaks do separate different parts of a document with unique formatting options. Deleting a section break may affect the layout and formatting of your document. Always review your document after removing section breaks to ensure that the formatting is intact.
- Check for hidden section breaks: Section breaks may be hidden in headers, footers, or even in blank lines. Make sure to check for hidden section breaks by displaying formatting marks and thoroughly reviewing your document.
- Use the “Show Next” and “Show Previous” buttons: When section breaks are close to each other, it may be challenging to place your cursor before or after the correct section break. Word provides “Show Next” and “Show Previous” buttons in the “Navigation” group on the “Layout” tab in the ribbon. These buttons allow you to navigate through section breaks easily and delete them accurately.
Tips and Tricks for Removing Section Breaks (Continues)
- Use “Find and Replace” for batch removal: If you have multiple section breaks in your document, you can use the “Find and Replace” function to remove them in bulk. Go to the “Home” tab in the ribbon, click on the arrow next to the “Find” icon in the “Editing” group, and select “Advanced Find” to open the “Find” dialog box. In the “Find what” field, type “^b” to search for section breaks. Leave the “Replace with” field blank, and click on “Replace All” to remove all section breaks in one go.
- Make a backup of your document: Before making any changes to your document, especially when removing section breaks, it’s always a good practice to make a backup of your document to avoid any accidental data loss or formatting changes.
Conclusion
Section breaks are useful formatting elements in Word that allow users to create documents with varying formatting options. However, there may be times when you need to remove section breaks to modify layout or formatting of your document. By following the step-by-step guide and tips provided in this article, you can confidently remove section breaks in Word and ensure a smooth editing experience. Remember to always review your document after removing section breaks to verify that the formatting is intact. With the right techniques and precautions, you can master the art of removing section breaks in Word. And can also create professional-looking documents with ease. Happy editing!
Read Also:
Like and comment.
Also, do not hesitate to share this with family, friends, and loved ones if you find this article beneficial.
Thanks for reading